
Designed for every stage, with comfort in mind

How to Share Early Parenting Responsibilities

It took both you and your partner to make this adorable, little poop-maker. So, it only makes sense that the child-rearing responsibilities be shared between you as well. In fact, a researcher from the University of Missouri (MU) found that husbands and wives are happier when household and child-related responsibilities are shared.

“Wives in our study viewed father involvement and participation in household chores as related,” says Adam Galovan, a doctoral student in the MU Department of Human Development and Family Studies. “Doing household chores and engaging with the children seem to be important ways for husbands to connect with their wives, and that connection is related to better couple relationships.”

Sharing parenting responsibilities not only helps lighten the workload but also strengthens your relationship and allows both parents to build meaningful bonds with their baby.

No matter how you look at it, divided tasks lead to a happy and more balanced household. Here are some tips on how to share the load.

Balance Doesn’t Always Mean 50/50

The same number of tasks doesn’t necessarily mean a balanced distribution of responsibilities. While your tasks might take you 30 minutes to accomplish, your partner’s might take a little longer to complete. So instead of quantifying chores, try to find the balance where both of you feel supported, appreciated, productive, valuable, and happy.

A good example of finding balance is using the differences in your body clocks to your advantage. If your partner is nocturnal, maybe he can take over the nighttime duties while you take over for most of the following day.

Communicate Openly (you aren’t the babies)

Don’t expect your partner to know what to do every time. If you’re overwhelmed, tired, or simply need a break, let your partner know. Keeping frustrations to yourself may eventually lead to resentment or unnecessary arguments.

If you decide not to speak up and just “take one for the team,” it may lead to negative feelings that are expressed in a furious or passive-aggressive manner later on. If you want your partner to tend to your needs, verbalize them.

Be Specific About What You Need

Be specific about the things you need your partner to do. Instead of plainly saying you need his help, ask him to do the specific tasks you can’t accommodate, such as feeding the baby, putting the baby to sleep, or going for a diaper run while you’re breastfeeding. Being specific helps meet your needs.

Be firm

Taking care of a newborn is a lot of work, and both parents are expected to be involved. While this is expected, the involvement is grossly unbalanced for many couples. Keep the balance by being firm about it.

Studies show that men take cues from their wives regarding what they’re supposed to do; in this, your husband looks to you for direction. This then goes back to verbalizing. Speak up, specify tasks, and be firm about them.

Respect Each Other’s Parenting Style

You and your spouse may have different parenting styles; something that works for you may not work for your husband.

For example, you may each have your own way of changing a diaper, soothing a crying baby, or putting your baby to sleep. As long as your baby is safe, comfortable, and well cared for, there’s often more than one right way to accomplish a task.

Simply accept that your partner’s methods may be different from yours. The less you criticize him, the more he will be willing to help with baby duties. Finally, remember the saying “it takes two to tango”. You and your partner are a team, so find a way to utilize each other’s strengths. Don’t forget to commend each other on the jobs well done; reward each other too. How you do so is entirely up to you.

Sharing parenting responsibilities isn’t about making every task exactly equal—it’s about creating a partnership where both parents feel supported and valued.

Everyone deserves reliable information and support. If there’s anything else you’d like to know about EQ products or if you need EQ support, we’re here for you. Reach out to us anytime.
First Family Outing With Your Baby: A Parent’s Guide

Bringing your baby home is an exciting milestone, but eventually, you’ll start wondering: “When is it safe to take my newborn outside?” For many first-time parents, planning your baby’s first family outing can feel both exciting and nerve-racking.

When your baby is born, and your maternal instincts kick in, you realize just how much everything is a potential threat. The outside world is harsh, and your own home is satisfactory only under your supervision. Keeping your newborn safe and going to obsessive lengths, such as wiping every surface that your newborn might come into contact with, is not crazy behavior. Protecting your baby is important, but that doesn’t mean you can’t venture out into the wide world.

The good news is that most healthy, full-term newborns can safely go outdoors as long as you take the right precautions and avoid unnecessary exposure to illness. However, if your baby was born prematurely or if your newborn’s immune system is particularly weak, you’ll have to consult your pediatrician before heading out:

No Age Limit for the Outdoors

Parents worry about their children and will continue to for the rest of time. However, there is no medical rule that healthy newborns must remain inside the house for weeks.

According to Anne Hansen, MD, MPH, medical director of the Neonatal Intensive Care Unit at Children’s Hospital Boston, “The idea that babies have to stay inside the house for several weeks after they’re born is FALSE. In fact, as long as your baby is healthy, getting some fresh air can be great for mom and baby if you take a few precautions.”

The only danger here is exposing your newborn to people who may be sick, but we’ll get to that later.

Choose the Best Time to Go Out

Timing can make a big difference when taking your newborn outside. If you decide to take baby out for a stroll in the park, be sure to time it just right. You’ll want to schedule your trips for either the first half of the morning or late in the afternoon to avoid the sun at its worst, and for no longer than a couple of hours.

Avoid the midday heat, especially in the Philippines where temperatures can become extremely high.

Take your newborn’s state of mind into consideration as well. Ideally, you should take them out at times when they’re content or in a good mood – usually after naps, feeding, and diaper changes. This sets your trip up for smooth sailing.

Strangers’ Dangers

Let’s get back to exposing your newborn to people. You’re bound to come across individuals and groups, but try to avoid or limit your time in and around crowds. Not only will you be avoiding more unwanted germs, you’re also protecting them from potentially getting overwhelmed and highly irritable.

If your trip is to the mall, be sure to have an escape route or be close enough to the exit if your child doesn’t respond to crowds well.

While friends and relatives may be excited to meet your baby, it’s perfectly okay to politely ask them not to kiss or touch your newborn, especially during the first few months.

Dress Baby Up Sensibly

Dress your newborn in relation to the temperature outside and not to “what’s hot and what’s not.” Cover all bases: your baby’s head, feet, and hands. Also, bring an extra jacket in case you’re going to an air-conditioned place where the temperature can be colder.

To protect your baby from the sun, keep them in the shade and use a wide-brimmed hat whenever possible. Sunscreen is generally recommended only for babies aged 6 months and older.

And because you might have to do a diaper change on the go, pick bottoms that snap all the way up the legs and may be quickly removed.

Packing to Your Heart’s Content

To satisfy your obsessive safety measures, packing for outings is the time you can feel free to go crazy.

It might seem like a lot, but for a mere two-hour trip, you’ll want to pack up to four diapers. Couple those with wipes as well. A change of clothes is also a must—another is up to you.

If you don’t feel comfortable breastfeeding in public, bring along a thick blanket with which to cover yourself. You could also bring an extra shirt or light cardigan, in case your baby pukes or showers you with their loving drool.

Anything else like toys, snacks, and a book for yourself is up to you!

You may also want to bring hand sanitizer, burp cloths, and small plastic bags for used diapers or soiled clothes to make cleanup easier while you’re away from home.

Enjoy Your First Family Outing

Your baby’s first family outing doesn’t have to be perfect. There may be unexpected diaper changes, crying spells, or sudden changes in plans, and that’s completely normal.

The important thing is spending quality time together while helping your baby gradually experience the world around them. With every outing, you’ll become more confident as parents and create memories you’ll cherish for years to come.

Ready to learn more? Explore our other blogs for more helpful tips and guides as you prepare for the big day.

If you have any questions about our products or need assistance, our EQ Support team is always ready to help.

How to Toddler-Proof Your Home: Room-by-Room Safety Tips

You’ll quickly realize how your entire home is dangerous to a toddler’s health once they’re up and about. Every corner will look more pronounced, every small item more mischievous, and every socket more dangerous. Your home, however cozy, is filled with potential threats to your little one, so you’ll want to make it as safe as possible. Here’s how you can do so.

Toddler-Proofing the Nursery

Let’s start at ground zero. This room is where your toddler will spend most of their time, so it’s important to keep it as safe as possible.

To make the room safer, remove blankets, pillows, and plush toys from your toddler’s crib, as these can pose suffocation risks. Apart from increasing the risk of suffocation, pillows and stuffed animals can also become stepping stools for adventurous toddlers trying to climb out of their cribs.

Mobiles are meant to entertain and relax babies, but once your child can pull themselves up to stand, there’s a good chance they’ll try to grab the hanging pieces. At this stage, it’s time to remove the mobile. You may also want to add soft floor padding to help cushion falls as your toddler begins walking.

Remember those dangerous electrical outlets? Cover them with plastic outlet covers, preferably sliding ones. Install outlet covers in every room your toddler can access.

Finally, go cordless. If your window blinds have cords, consider replacing them with cordless versions. Children can accidentally become entangled in blind cords, creating a serious strangulation hazard.

Toddler-Proofing the Living Room

Coffee tables, entertainment consoles, shelves, benches, or certain chairs: the living room is quite an edgy place for a baby with newfound mobility. Many of these corners and edges are right around eye level for a two-footer too, so be sure to cushion all edges with bumpers.

The living room typically holds a lot of décor as well, which means more breakables! Children can surprise you with how far they can reach, so keep all fragile mementos away from your little ones. For instance, picture frames are nice to look at but can easily shatter when dropped and can cut your child.

For taller, larger furniture like bookcases, be sure to secure them to the wall by way of bolts or adjustable locking furniture straps. You don’t want your child tipping over anything taller than them. This also goes for stairs; once your child is up and about, block the stairs with a baby gate.

Again, cover all outlets. While you’re at it, hide all electrical cords behind furniture.

Toddler-Proofing the Bathroom

Never leave your child unattended in the bathroom, even for a few seconds.

That being said, let’s start with the floors. Since they’re moist most of the time, invest in nonslip mats, and place some in the tub as well. In the immediate area outside the bathroom, consider placing rugs with non-skid backings, as your child might still be wet after a bath and looking to make a break for it.

Close toilet lids and keep them shut! Doing so keeps your child from unsanitary exposure, getting their fingers slammed on, and can even save them from drowning (it happens!).

Also, consider installing a medicine cabinet if your bathroom doesn’t have a place to store your medicines or razors. Even if these hazards are on a high shelf, at some point your child will try to reach for them.

Finally, make sure to pad your tub faucet and to use plastic soap dishes instead of glass or ceramic to be extra safe.

Toddler-Proofing the Kitchen

The kitchen contains some of the biggest safety hazards in any home. Keep dangerous items out of reach or secured inside childproof cabinets, including:

  • Cleaning products
  • Cutlery
  • Utensils
  • Plastic bags
  • Kitchen appliances
  • Dishes
  • Glasses and other breakables

In fact, invest in plastic or unbreakable dishes and glasses to use when your child’s around. Unplug small appliances when not in use and be sure not to leave their cords dangling like fish bait.

Let’s not forget the refrigerator. Ensure that you close the door carefully after opening it, especially if your child is already able to open it on his own. Besides getting their fingers caught in the door, children could hurt themselves trying to reach for bottles and such on higher shelves and compartments.

General Toddler-Proofing Tips

Now that the rest of your home is toddler-proof, here are other ways you can safeguard your kid:

  • Keep hot food and drinks away from edges of tables and counters.
  • Avoid using tablecloths or placemats as your child can easily tug and drag down everything on top of them.
  • Anchor floor lamps or remove them altogether.
  • Use doorstops and door holders to protect your child’s fingers.

Creating a Safer Home for Your Toddler

As your toddler becomes more curious and independent, new safety risks will naturally appear around your home. Regularly checking each room for potential hazards can help prevent accidents while giving your child a safe space to explore and learn.

Toddler-proofing your home doesn’t mean removing all the fun—it simply means creating an environment where your little one can discover the world more safely.

We hope this guide has given you the information you were looking for. If you have any further questions or need assistance with our products, feel free to get in touch with our EQ support.

References:

http://www.parenting.com/gallery/babyproofing-your-home?page=0

http://www.askdrsears.com/topics/parenting/child-rearing-and-development/how-toddler-proof-your-home-room-room-guide

http://www.parents.com/toddlers-preschoolers/safety/toddlerproofing/childproofing-home-room-by-room/

http://www.babycenter.com/childproofing-checklist-before-toddler-and-beyond

How to Help Your Teething Baby Sleep Better

Your baby’s smile may be one of the most beautiful things you can see. However, the journey to seeing that toothy smile is not an easy one, as teething is one of the most challenging phases of parenthood.

Babies begin developing teeth as early as a few months old, but it takes a while before they appear. Common signs of teething include drooling, chewing, increased biting and sucking, a low-grade fever, and restlessness at night, often accompanied by crankiness and crying. This is one of the stages of raising a child that many parents find difficult because of the sleepless nights and endless cries of their little one.

Soothing a teething baby can be challenging, especially at bedtime. Fortunately, there are a few simple tips you can keep up your sleeve to help your baby sleep faster and more comfortably.

5 Tips to Help Your Teething Baby Sleep Better

1. Maintain a Steady Bedtime Routine

As you may be well aware of by now, motherhood involves inconsistent sleeping patterns for your child. Just as you are finally able to work out a pattern for their bedtime, they begin teething. During the day, your baby is not too fussy even when teething because they are preoccupied with other activities. When bedtime comes, however, they have nothing else to do, so they notice the pain and discomfort.

Make sure that they are asleep at set times of the day. Sticking to a schedule ensures that your baby gets the right amount of sleep.

2. Create a Comfortable Sleep Environment

It is best to keep your baby’s room quiet and peaceful to create an environment conducive to sleeping. Having this environment calms them and makes them sleep more easily.

Here are some ways to help create an ideal sleeping environment for your baby:

  • Rock your baby in your arms using a constant motion. This relaxes babies and induces sleep.
  • Swaddle them in a blanket. A warm, fuzzy environment around your baby helps them relax and fall asleep faster.
  • Sing them lullabies or hum. A steady, soft sound coupled with a fairly quiet environment is ideal for sleeping.

3. Soothe Your Baby’s Teething Pain

There are a number of remedies available to help soothe your baby’s teething pain. The most basic way is to softly massage your baby’s gums with clean fingers. You can also use teething toys or chilled pureed apples if your baby is old enough for them.

In some situations, parents give their babies medicines like painkillers, but it is strongly recommended to consult your pediatrician before doing so. Always consult your pediatrician before giving your baby any medication.

4. Offer Soft Foods Before Bedtime

Always keep in mind that your baby’s gums are sensitive during the teething period. It is wiser to just feed them with breast milk, baby formula, or mashed food just before bedtime to avoid stressing their gums.

5. Patience Is the Key

It is understandable for any parent to feel frustrated with the situation, but the most important trick in dealing with a teething infant at bedtime is patience – loads and loads of patience. It is important to understand that they do not want to be in this much pain as much as you do not want to be in this situation. Being more patient and understanding towards your baby can also help you develop a closer bond with them.

Teething Is Temporary

Teething is never easy, but it is only temporary. It is only the appearance of the first few teeth that are the most difficult for your baby, but the succeeding ones will be easier to deal with.

Teething pains usually last for a few months – that’s a few months of sacrifice in exchange for your baby’s toothy smile that will stay in your memory for a very long time. Seeing your baby’s cute smile in exchange for all of those sleepless nights is surely worth it, don’t you think?

We hope this article has given you the information you were looking for. If you have any further questions or need assistance with our products, feel free to get in touch with our EQ support.

Potty Training 101: A Parent’s Guide to Toilet Training Your Child

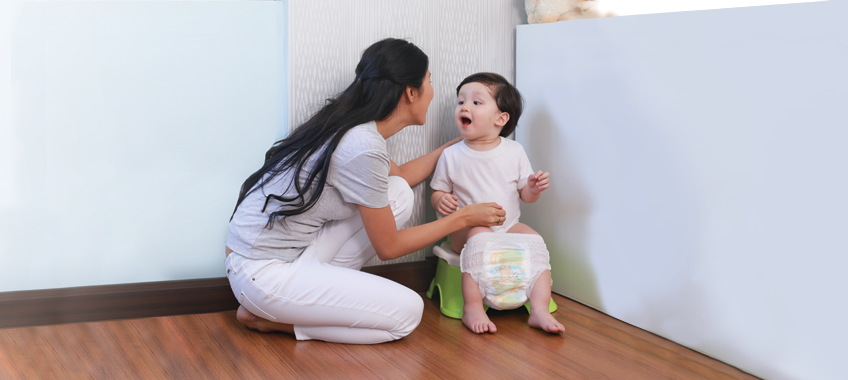
Potty or toilet training is a special time in your baby’s life. For the child, the challenge is developing control over their bladder and stomach, and applying this newfound skill as they try to understand their parent’s instructions. For the parents, it’s learning to effectively teach something second nature to them and explain it to a beginner – overwhelming, but doable. As with any cooperative effort, communication and patience go a long way.

If you think it’s time to start potty training your child, consider the following:

Is Your Child Ready for Potty Training?

According to Dr. Mark Wolraich, professor of pediatrics at the University of Oklahoma Health Sciences Center, “The average age at which a child will start to show interest in learning to potty train is around 2 years, but it’s a bell shaped curve – some will go earlier and others not until 3 or even 4.”

While there is a general age range, every child becomes ready for potty training at their own pace. Your job is to assess your child’s behavior and watch for certain signs.

Your child might be ready if they:

  • Look for privacy or go quiet when they pee or poop in their diaper
  • Show interest in the toilet or in wearing underwear
  • Can follow basic instructions
  • Express through facial reactions or words when they need to go
  • Stay dry during the day for 2 hours or longer
  • Complain about wet or dirty diapers

How to Potty Train Your Child Successfully

Lead By Example

From time to time, take your child to the bathroom with you when you have to go. Let your child observe how you use the toilet and wash your hands after you’ve finished. This helps your child understand how going to the potty works and what it looks like.

Be Mindful and Respond Quickly

When you see your child showing signs of needing to use the toilet (such as squirming, squatting, or holding the genital area), act on it right away and take them to the toilet. This helps your child identify these signals faster and become accustomed to using the potty.

For girls, show them how to wipe carefully from front to back. Explain that this prevents germs from the rectum area from reaching the vagina. They may not understand this yet, but it’s never too early to start instilling good hygiene in your child.

Positive Reinforcement

Each time your child successfully goes potty, give them verbal praise and be positive to encourage them. Even when they aren’t successful, stay positive. Never punish them and make them feel that the toilet really is a comfort room and they are not to be punished for using it. Never punish your child for accidents. Instead, reassure and encourage them so they continue to feel comfortable using the toilet.

Set a Schedule

It’s good to be consistent. Suggest going to the bathroom at set times of the day like when they wake up in the morning, before riding the car, after dinner, and before bedtime, among others. Even if they end up not going, it’s still encouraged to have them sit on the potty a few minutes at a time throughout the day. This is a good way to condition them to use the toilet.

Bye-Bye Nappies

If your child has used the toilet consistently for a couple of weeks, you can get rid of the nappies.

While your child might be able to stay dry during the day, nap and sleep time is different. Kids are usually deep sleepers and often sleep through what would’ve been a potty session. Staying dry through the day and nighttime sleep may take months or years compared to the two to three months it takes them to learn to control their bladder when awake. For this, consider disposable training pants.

Anticipate Accidents

Learning to use the toilet takes time, and accidents are a normal part of the potty training process. Tell your child it’s all right and ask them to help you clean up. Take the opportunity to gently remind them to use the potty next time.

Rain Check on Training

If your child resists or is having a difficult time using the toilet within the first few weeks, maybe he just isn’t ready yet. You can hold out for a few months.

Also, know that major events and life changes can make potty training difficult. For instance, moving to a new home or a death in the family can cause your child’s potty skills to regress or return to a less developed state, notes Wolraich. Your job is to simply be patient and continue potty training and encouraging them.

Potty Training Takes Time and Patience

Every child learns at their own pace, so try not to compare your little one with others. With consistency, encouragement, and plenty of patience, your child will gradually become more confident using the potty. Remember that accidents are a normal part of learning, and celebrating small milestones can make the potty training journey a more positive experience for both you and your child.

With these tips in place, you are on your way to successfully potty training your child. Have more questions about preparing for pregnancy or caring for your little one? Explore our other blogs for more helpful tips and guides. If you need assistance or have questions about our products, our EQ Support team is always here to help.

Get your EQ Products from our Official Stores

Please transact only through the official EQ Diapers online stores and authorized channels. EQ Diapers and JS Unitrade Merchandise Inc. are not responsible for transactions made through unofficial sellers, fake accounts, or unauthorized online pages.

Follow EQ Diapers

For tips, updates and more!

Stay connected with EQ Diapers for expert tips,
exclusive promos, and everything you need for your little one. 💙