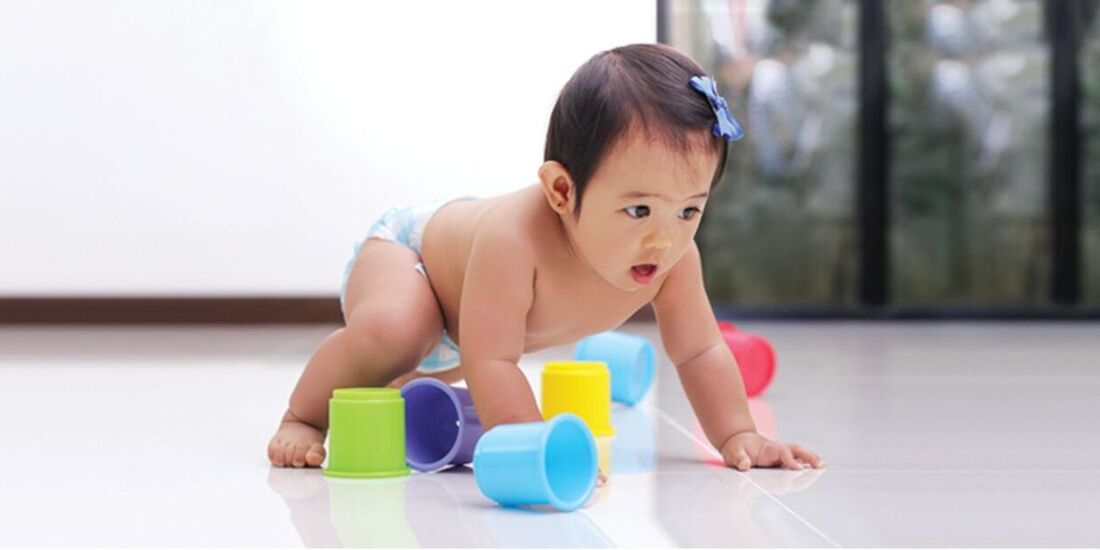

Designed for every stage, with comfort in mind

5 Safe Exercises During Pregnancy to Prepare for Childbirth

Some pregnant women are wary of overexerting themselves and would rather rest than exercise. While getting enough rest is important, safe exercise during pregnancy also plays a significant role in preparing your body for childbirth.

Proper exercise increases your strength, flexibility, and endurance. It does wonders for your mood, relieves body aches, and improves sleep. Also, maintaining a workout routine makes getting back to your pre-pregnancy body easier.

“You need to be physically active during pregnancy. It has terrific benefits that are associated with a better pregnancy outcome and even shorter labor. It’s a win-win for baby and for mom,” says high-risk pregnancy expert Laura Riley, MD, spokeswoman for the American College of Obstetricians and Gynecologists (ACOG) and author of Pregnancy: You and Your Baby. ACOG recommends pregnant moms spend at least 30 minutes doing moderate-intensity exercises at least 3 times a week.

Safe Pregnancy Exercises to Try

It’s time to get physical! Here are 5 heart-pumping exercises that are safe for both you and your unborn child.

1. Swimming

Swimming is one of the best and safest exercises for pregnant women. Aside from working out your arms and legs, swimming reduces swelling and pain in your back and joints. It also helps with posture as the buoyancy allows you to easily maintain an upright position.

2. Tailor Sitting

This is a great way to strengthen and stretch your back, thigh, and pelvic muscles. Sit on the floor with your back straight and keep the soles of your feet pressed together. From there, slowly push your knees toward the ground using your elbows to stretch your inner thighs. Hold this position for 10 to 15 seconds and make 10 repetitions.

This exercise keeps your pelvic joints flexible and improves blood circulation to your lower body, both of which ease delivery.

3. Kegel Exercises

This exercise also targets your pelvic floor muscles. As these muscles support pelvic organs (uterus, bladder, and bowels), toning them can reduce late pregnancy problems like hemorrhoids.

While urinating, try to stop midstream without using your abdominal, buttock, or thigh muscles. The vaginal muscle that you can feel contracting is your pelvic muscle. Contract this muscle and hold for 10 seconds and repeat 10 times, relaxing in between repetitions.

4. Squatting

Squatting opens the pelvic outlet, giving you – or rather, your little one – up to an extra 1/2-inch to descend during labor.

With your feet apart, keep your back straight against a wall, and slowly slide down to a full squat position with your thighs parallel to the floor. Hold this position for 10 seconds and slowly rise to your original position. Make 10 repetitions.

5. Pelvic Tilt

This exercise strengthens your abdominal muscles and improves your back flexibility, reducing back pain during pregnancy and labor.

For this exercise, you are to go down on all fours – hands and knees, while keeping your head aligned with your back. From this position, pull in your tummy and arch your back towards the ceiling, and hold for 10 seconds. Then, relax your tummy, move back into the original position, and repeat 10 times.

Preparing Your Body for Childbirth

These exercises can benefit you with minimal effort without needing any equipment. However, while exercising helps prepare you physically for the big day, you have to be prepared mentally by getting to know your hospital and having a plan. This helps keep your mind at ease as you approach your due date.

Always consult your doctor before starting or continuing an exercise routine during pregnancy, especially if you have a high-risk pregnancy or any medical concerns.

We hope you found this guide helpful. If you have any questions about our products or need additional assistance, our EQ support team is always ready to help.

References:

http://www.webmd.com/baby/features/exercise-during-pregnancy-myth-vs-fact

http://www.parents.com/pregnancy/giving-birth/preparing-for-labor/exercises-to-help-you-prepare-for-childbirth/

http://www.babycenter.com/0_the-best-kinds-of-exercise-for-pregnancy_7880.bc

How to Toddler-Proof Your Home: Room-by-Room Safety Tips

You’ll quickly realize how your entire home is dangerous to a toddler’s health once they’re up and about. Every corner will look more pronounced, every small item more mischievous, and every socket more dangerous. Your home, however cozy, is filled with potential threats to your little one, so you’ll want to make it as safe as possible. Here’s how you can do so.

Toddler-Proofing the Nursery

Let’s start at ground zero. This room is where your toddler will spend most of their time, so it’s important to keep it as safe as possible.

To make the room safer, remove blankets, pillows, and plush toys from your toddler’s crib, as these can pose suffocation risks. Apart from increasing the risk of suffocation, pillows and stuffed animals can also become stepping stools for adventurous toddlers trying to climb out of their cribs.

Mobiles are meant to entertain and relax babies, but once your child can pull themselves up to stand, there’s a good chance they’ll try to grab the hanging pieces. At this stage, it’s time to remove the mobile. You may also want to add soft floor padding to help cushion falls as your toddler begins walking.

Remember those dangerous electrical outlets? Cover them with plastic outlet covers, preferably sliding ones. Install outlet covers in every room your toddler can access.

Finally, go cordless. If your window blinds have cords, consider replacing them with cordless versions. Children can accidentally become entangled in blind cords, creating a serious strangulation hazard.

Toddler-Proofing the Living Room

Coffee tables, entertainment consoles, shelves, benches, or certain chairs: the living room is quite an edgy place for a baby with newfound mobility. Many of these corners and edges are right around eye level for a two-footer too, so be sure to cushion all edges with bumpers.

The living room typically holds a lot of décor as well, which means more breakables! Children can surprise you with how far they can reach, so keep all fragile mementos away from your little ones. For instance, picture frames are nice to look at but can easily shatter when dropped and can cut your child.

For taller, larger furniture like bookcases, be sure to secure them to the wall by way of bolts or adjustable locking furniture straps. You don’t want your child tipping over anything taller than them. This also goes for stairs; once your child is up and about, block the stairs with a baby gate.

Again, cover all outlets. While you’re at it, hide all electrical cords behind furniture.

Toddler-Proofing the Bathroom

Never leave your child unattended in the bathroom, even for a few seconds.

That being said, let’s start with the floors. Since they’re moist most of the time, invest in nonslip mats, and place some in the tub as well. In the immediate area outside the bathroom, consider placing rugs with non-skid backings, as your child might still be wet after a bath and looking to make a break for it.

Close toilet lids and keep them shut! Doing so keeps your child from unsanitary exposure, getting their fingers slammed on, and can even save them from drowning (it happens!).

Also, consider installing a medicine cabinet if your bathroom doesn’t have a place to store your medicines or razors. Even if these hazards are on a high shelf, at some point your child will try to reach for them.

Finally, make sure to pad your tub faucet and to use plastic soap dishes instead of glass or ceramic to be extra safe.

Toddler-Proofing the Kitchen

The kitchen contains some of the biggest safety hazards in any home. Keep dangerous items out of reach or secured inside childproof cabinets, including:

  • Cleaning products
  • Cutlery
  • Utensils
  • Plastic bags
  • Kitchen appliances
  • Dishes
  • Glasses and other breakables

In fact, invest in plastic or unbreakable dishes and glasses to use when your child’s around. Unplug small appliances when not in use and be sure not to leave their cords dangling like fish bait.

Let’s not forget the refrigerator. Ensure that you close the door carefully after opening it, especially if your child is already able to open it on his own. Besides getting their fingers caught in the door, children could hurt themselves trying to reach for bottles and such on higher shelves and compartments.

General Toddler-Proofing Tips

Now that the rest of your home is toddler-proof, here are other ways you can safeguard your kid:

  • Keep hot food and drinks away from edges of tables and counters.
  • Avoid using tablecloths or placemats as your child can easily tug and drag down everything on top of them.
  • Anchor floor lamps or remove them altogether.
  • Use doorstops and door holders to protect your child’s fingers.

Creating a Safer Home for Your Toddler

As your toddler becomes more curious and independent, new safety risks will naturally appear around your home. Regularly checking each room for potential hazards can help prevent accidents while giving your child a safe space to explore and learn.

Toddler-proofing your home doesn’t mean removing all the fun—it simply means creating an environment where your little one can discover the world more safely.

We hope this guide has given you the information you were looking for. If you have any further questions or need assistance with our products, feel free to get in touch with our EQ support.

References:

http://www.parenting.com/gallery/babyproofing-your-home?page=0

http://www.askdrsears.com/topics/parenting/child-rearing-and-development/how-toddler-proof-your-home-room-room-guide

http://www.parents.com/toddlers-preschoolers/safety/toddlerproofing/childproofing-home-room-by-room/

http://www.babycenter.com/childproofing-checklist-before-toddler-and-beyond

5 Ways to Give Your Baby a Good Night’s Sleep

A mother’s quality of sleep is only as good as her baby’s. Since your little one is still getting used to literally everything, whole nights of sleep are a rarity. You’ll want to take necessary actions to put your baby and yourself in the best position for a full night’s sleep to enjoy each other’s company during daytime.

Here are five practical ways to help your baby sleep through the night.

1. Pass on the Pacifier 

Pacifiers often fall out of infants’ mouths in the middle of the night. This slight change is enough to wake them up and cause them to cry. Around their 8th month, most babies will have developed the fine motor skills required to place the pacifier back into their mouths. Until then, however, you’ll be dealing with a cranky baby.

“Your choice is either to get rid of the pacifier altogether, or to let your baby cry it out in the middle of the night,” warns founder of NYC Sleep Doctor Janet K. Kennedy, PhD. Foregoing the pacifier may cause a rough couple of days, but eventually your baby will not need it to sleep through the night.

2. Say Yes to An Electric Fan

The slightest noise can interrupt a baby’s sleep. One way to minimize this is by using white noise, such as the steady hum of an electric fan.

When used safely as part of your baby’s bedtime routine, consistent background noise can help mask sudden sounds that may wake them. Over time, your baby may begin to associate the familiar sound with sleep.

3. Gradually Reduce Nighttime Feedings

Many mothers feed their infants at odd hours of the night to soothe them back to sleep. While this can work, it does take its toll on these already exhausted mothers. Take a load off, close shop, and get some rest! Consult your pediatrician when you can completely cut off your baby from night feeding. According to Kim West, clinical social worker and author of 52 Sleep Secrets for Babies, 90% of 6-month-olds can sleep through the night without feeding.

To do so, put your baby to bed while they’re still awake but clearly sleepy. Leave them be without feeding them and check in on them every few minutes until they’re asleep. If you don’t want to suddenly stop nighttime feeding, you can gradually decrease their nighttime food intake. Eventually your baby will realize that the milk bank closes at night and will sleep through it.

Always consult your pediatrician before weaning your baby from nighttime feedings

4. Set a Bedtime Routine

This is no hack or trick: a bedtime routine is important to set your baby up for a good night’s sleep. “Creating a bedtime routine for a child is a simple step that every family can do,” says Jodi Mindell, PhD, Professor of Psychology at Saint Joseph’s University and Associate Director of the Sleep Center at Children’s Hospital of Philadelphia. “It can pay off not only to make bedtime easier, but also that a child is likely to sleep better throughout the entire night.”

To set a routine, consider the following:

  • Set active games for daytime and quieter games for nighttime. This way, your baby won’t be as hyper before bedtime and will be tired from the day’s earlier games.
  • Give your baby a bath right before bedtime to put them in a calmer state.
  • Your baby’s favorite activity should be saved for last and performed in the bedroom. It’s a simple association: your baby will associate their favorite activity with their bedroom, which makes them look forward to bedtime. (link to 7 Tips to Make Baby’s Bedtime Easier article)

As much as possible, keep the conditions of their sleep space consistent (lights, sounds, temperature, etc.). This will comfort them should they wake up abruptly.

5. Encourage Active Play During the Day

Babies spend all their energy trying to master newly acquired skills, like rolling or crawling. A baby can find themselves stuck in a new position and may be unable to get back to their original position, though they’ll try as much as they can. They can get so excited that they have a hard time getting back to sleep.

To help tone down your baby’s persistent late-night work ethic, devote time during the day for them to practice their new skill. Avoid the stroller if you can and allow your baby to move around. Let them exert energy and tire themselves out during the day for a deeper nighttime sleep.

We hope this guide has helped answer your questions. If you’d like to learn more or need EQ support, don’t hesitate to reach out.

How Can I Help My Baby Fall Asleep Faster?

Are you having trouble getting your little one to sleep? Babies are still getting used to everything, so their lives are a constant seesaw of comfort and discomfort, as well as of understanding and confusion. For instance, nighttime and daytime are concepts they are yet to understand, so putting them to bed can be difficult.

The good news is that a calming bedtime routine can help your baby fall asleep faster. Here are simple tips to make bedtime easier for both you and your little one.

7 Tips to Help Your Baby Fall Asleep Faster

1. Set a Consistent Bedtime Routine

While routines vary depending on parent and child, make sure to have one, as a consistent bedtime routine is important for your baby to learn the difference between day and night. Eventually, your little one will learn that nighttime means sleep time.

To have an efficient routine, have your baby play active games during the day as opposed to quieter, calming activities at night. Engage your baby in the same games or activities in the same order, leaving your baby’s favorite nighttime activity for last. This way, your baby will associate the fun with bedtime.

2. Give Your Baby a Warm Bath Before Bedtime

A nice, warm bath at the end of the day can soothe and relax your baby. Avoid using toys when giving them a nighttime bath, and keep your voice low and overall activity calm. The warm water coupled with your gentle strokes will put your baby in an ideal state for sleep.

3. Drowsiness is Your Friend

Know your child’s habits and determine when they get drowsy. When your baby starts to slow down, put them to bed before they’re out cold completely. Once you are able to identify that sweet spot of “drowsy, but awake,” bedtime becomes smoother.

In fact, according to Kim West, a professional sleep consultant and author of Good Night, Sleep Tight, “Babies who drift off on their own are more likely to fall asleep quickly and learn how to soothe themselves to sleep more easily.”

4. Keep the Room Cool and Comfortable

A cool room temperature sets babies up for a more comfortable sleep. The ideal temperature for babies to sleep in is around 18°C (65°F). If you don’t have an air conditioner, keep the windows open and/or use an electric fan.

Also, keep your baby’s room warmer during the day when they’re active. Include this in your routine to help them differentiate the different times of the day, and to regulate their developing circadian rhythm or body clock.

5. Turn Down the Lights

 Manipulation of light can also help regulate your baby’s body clock. Light is a natural, biological wake-up button, while darkness prompts your brain to release melatonin, a hormone that induces sleep.

Consider installing dimmers in your baby’s room. To help your baby fall asleep faster, dim the lights about two hours before bedtime or as the sun goes down. Make sure the room is brightly lit during the day to reinforce their circadian rhythm.

You can have sunlit rooms for naps. However, if your baby has trouble napping during the day, consider getting dark curtains. When it’s time to get up, let the light back in!

6. Be a Baby Masseuse

You can never be too young to benefit from a good massage. According to studies conducted at the Touch Research Institute at the University of Miami, babies and toddlers who receive bedtime massages fall asleep faster than those who don’t receive them or were just read bedtime stories.

Be sure to use baby-friendly oil, gentle strokes, and mild pressure for optimum results.

7. Avoid Too Much Eye Contact

Finally, babies are very easily stimulated. Something as subtle as a gaze is enough to snap a baby out of their sleepy trance – especially from their mother. So, as cruel as it may sounds, try to avoid eye contact when putting your little one to sleep. By all means, allow them to hear your soothing voice and to feel your loving touch, but don’t overstimulate them with your encouraging eyes.

Helping Your Baby Fall Asleep Faster

Every baby develops sleep habits at their own pace, so don’t worry if it takes time to find a bedtime routine that works. Being consistent with your routine and creating a calm sleeping environment can make it easier for your baby to relax and fall asleep.

Most importantly, be patient. As your baby grows and becomes more familiar with the difference between day and night, bedtime will gradually become smoother for both of you.

That’s all for now, mommies. Sleep tight!

We hope this article has been helpful. For any product inquiries or if you need further assistance, our EQ support team is here to help. Feel free to reach out anytime.

Baby Colic: Tips to Help Soothe a Colicky Baby

The first few months of parenthood are the hardest. The feeling of helplessness every time your baby cries is a dilemma that every parent goes through. Hunger, pain, discomfort, restlessness – a hundred different possible reasons run through every parent’s mind every time their baby cries. However, if your baby cries for hours at a time with no obvious reason, they may be experiencing colic.

Colic is a condition that causes pain in your baby’s gastrointestinal tract. Colic usually affects babies who are at least 2-3 weeks old and lasts until the 3rd or 4th month. The symptoms include irritability, abdominal pain, gassiness, and endless bouts of uncontrollable crying.

How to Help Soothe a Baby with Colic

If you think your baby is suffering from colic, you can try some of the tips below to help soothe your baby:

Review Your Diet if You’re Breastfeeding

If you think that your baby’s colic may be caused by something in your breast milk, you can try changing your diet. It has been found that traces of spicy food or cow’s milk in the mother’s diet cause the baby’s tummy problems after they ingest her breast milk. Talk to your doctor about what you can eliminate from your diet.

One way of preventing this is to eliminate dairy products like cow’s milk, cheeses, and yogurt from your diet. In order to do this, stop eating them for a few weeks. This will give your body ample time to cleanse out any traces of dairy in the milk that your breasts produce.

Talk to your doctor before making major dietary changes.

Adjust Your Baby’s Feeding Habits

If your baby is formula-fed and still experiences colic, consult your pediatrician to determine whether a different infant formula may be more suitable. Some babies may have sensitivities or allergies that require a hypoallergenic formula.

Another possibility is swallowed air during feeding, which may contribute to gas and discomfort. Burping your baby during and after feeding can help. If you’re bottle-feeding, using a nipple with an appropriate flow may also reduce the amount of air your baby swallows.

Try a Gentle Infant Massage

An infant massage can help your baby relax and calm down.

If gas seems to be contributing to their discomfort, place your baby tummy-down across your legs and gently rub their back. Another option is to lay your baby on their back and slowly move their legs in a bicycle motion. This gentle movement may help release trapped gas.

Comfort Your Baby

The discomfort caused by colic is the main reason why your baby keeps on crying. Comfort him by holding him close to you so he can feel your heartbeat. Sit down, relax, and take steady breaths while holding him and wait until your heartbeat stabilizes. The steady sound of your heartbeat will help calm him down.

Another way to help comfort your baby is through motion. Gently rock your baby in your arms using a steady rhythm to soothe him. You can also take him for a stroll, a ride, or a walk to help him relax. Soothing sounds can also help ease your baby’s discomfort – try humming or singing a lullaby to help your baby relax and fall asleep.

Comfort is the number one cure for colic. Since colic causes discomfort to your baby, learning what makes your baby comfortable is the number one solution to ease his pain. Don’t be scared or distressed every time your baby cries. It is through these rough moments that you grow as a parent. And it is through these moments that you understand what it takes to become a good parent.

When to Talk to Your Pediatrician

While colic usually goes away on its own as your baby grows, it’s important to contact your pediatrician if your baby’s crying is accompanied by fever, vomiting, poor feeding, difficulty breathing, or if you are concerned about their overall health. These symptoms may indicate a condition other than colic.

We hope this guide has answered your questions. If there’s anything else you’d like to know about our products or if you need assistance, feel free to contact our EQ support team.

Sources:

http://www.babycenter.com/0_colic-what-is-it_77.bc

http://www.webmd.com/parenting/baby/colictreatments

http://www.babycentre.co.uk/x25005619/how-can-i-soothe-my-colicky-baby#ixzz41uNiTzcz


Third Trimester of Pregnancy: Preparing for Labor and Your Baby’s Arrival

The third trimester of pregnancy is the most critical phase of pregnancy. This is when your baby’s development inside the womb enters its final stages, and your body prepares for labor and your baby’s arrival.

As a first-time mother, you might be wondering if you’ve done everything you need to prepare. You’ve gone through the cravings, morning sickness, and countless prenatal checkups, and now you may be asking yourself if there are any final preparations before your little one arrives.

How to Prepare During the Third Trimester of Pregnancy

Here are some important things you can do during your third trimester to help you prepare for labor and welcome your baby with confidence.

Avoid Overworking Yourself

The second trimester might have given you a lot of energy, but the same cannot be said for the final trimester. Your baby will still grow in size from about 2 ½ lbs. to at least 6-9 lbs. Carrying your baby’s weight around can deplete most of your energy. This is why doctors strongly recommend avoiding anything that can stress or overwork you.

Standing for long periods of time can put pressure on your feet and make your ankles swell. Sit down and prop your legs on top of a chair to reduce the swelling.

Another common situation for pregnant women is incessant back pain because of your expanding belly. To relieve the pain, sit down every few minutes, try an underbelly support garment and sleep on your side.

Perform Pregnancy-Safe Exercises

In order to prepare your body for labor, try some small exercises for expectant mothers. One example of an exercise that’s perfect for expectant mothers is swimming.

When people are in the water, they weigh one-tenth of their regular weight on land. This means you will weigh less, and the strain on your legs will be minimal.

Prenatal yoga is another option that expectant mothers can look into. Prenatal yoga can develop flexibility that will help reduce the pain in labor for mothers.

Before starting any exercise routine, consult your healthcare provider to make sure it is safe for your pregnancy. Always avoid overexerting yourself.

Prepare for Labor

As the final weeks of your pregnancy approach, you and your partner should start preparing for labor.

First, know which hospital or clinic you are going to give birth in. Normally, mothers choose the hospital nearest their home where their doctor is also practicing. This ensures that they will have their doctor when they give birth, and they will know where to go once their water breaks and they are ready to give birth.

Second, pack a bag of clothes and store them nearby so that you’re ready to go anytime that you go into labor.

Third, you should be ready with the things your baby will need, such as diapers, clothes, a crib, and so on. This way, you will have everything you need for the baby when you get back from the hospital.

Read Up on Breastfeeding

Part of being a mother is breastfeeding. As your pregnancy progresses, your body also prepares your breasts to breastfeed your baby. There are several exercises that you can try to get your body ready for breastfeeding. You can also join breastfeeding if you have zero idea on how to breastfeed. If you want to learn more about breastfeeding, you can read about it here.

Choose a Pediatrician

With weeks left before your baby comes, check out your local pediatricians and decide who among them will be your baby’s doctor. This is a decision you have to make beforehand to make sure that your baby’s pediatrician is someone you can trust and run to in times of emergency.

Consider factors such as the clinic’s location, consultation fees, office hours, and the services they offer when making your decision.

Getting Ready for Your Baby’s Arrival

The third trimester is the phase marked by countless preparations for the coming of the family’s newest member. It is at this phase that your baby undergoes the most changes to prepare itself for the world outside.

A lot of complications can happen during childbirth. This is why it’s really important to be prepared for the baby’s needs this early to avoid worrying about it when you go into labor.

Sources:

http://www.whattoexpect.com/pregnancy/exercises-for-pregnant-women

http://www.parenting.com/article/thirdtrimestersymptoms

http://www.babycenter.com/0_the-ultimate-pregnancy-to-do-list-third-trimester_10341209.bc?

http://www.webmd.com/baby/guide/thirdtrimesterofpregnancy?page=2

http://www.mayoclinic.org/healthylifestyle/pregnancyweekbyweek/indepth/pregnancy/art20046767?p=1

From Nipple to Bottle: Transitioning from Breastfeeding to Bottle Feeding

Maybe your maternity leave is over, or your baby is less interested in drinking milk now that they have started eating solid food. Whatever the reason, transitioning from breastfeeding to bottle feeding is not easy for any mother.

More than just mealtime, breastfeeding is also a special bonding moment between a mother and her baby. However, there comes a time when you may need to transition your baby’s feeding routine from breastfeeding to the bottle. While it can be challenging, taking the process one step at a time can make the transition easier for both you and your baby.

5 Tips for Transitioning from Breastfeeding to Bottle Feeding

1. Check Your Baby’s Readiness

The best sign to see if your baby is ready for bottle feeding is to let your baby decide.

At around 6 months of age, babies are usually well into eating solid food. This can be a good time to slowly introduce a bottle since they are beginning to get nutrition from other food sources and may nurse less often.

If you’re not yet ready to introduce your baby to solid food, take a look at how to ease them into it here.

2. Pick the Perfect Time

You cannot switch your baby’s feeding method from breastfeeding to bottle feeding overnight. It has to be done gradually.

Choose a time of day when your baby is usually relaxed and not overly hungry. Avoid offering the bottle during the first morning feed or the last feeding before bedtime, as these are often the times when babies are most attached to breastfeeding. Instead, try introducing the bottle during the afternoon while your baby is calm or engaged in play.

3. Let Someone Else Offer the Bottle

Babies tend to associate feeding with their mother’s breast. This is why it’s hard to convince them to drink from the bottle when the mother’s breasts are nearby.

Ask for help from either your husband or someone else with you to feed them using the bottle. Be sure to stay in another room while they do so that the baby does not see you. That way, your baby can keep their special bond of breastfeeding with you.

4. Find the Right Bottle and Nipple

Your baby may not accept the first feeding bottle you offer, so finding the right one often involves some trial and error.

Choose a bottle nipple with an appropriate flow. Holes that are too large may cause sputtering or gagging, while holes that are too small may make feeding frustrating.

It also helps to choose a nipple that is similar in shape and material to your baby’s pacifier. If they use a latex pacifier, consider using a latex bottle nipple as well. You can even rub a small amount of breast milk on the bottle nipple to help your baby become more familiar with it.

5. Ease Breast Engorgement

Some mothers stop breastfeeding their children regularly once they have successfully transitioned to bottle-feeding. In case you want to stop breastfeeding, your breasts may become painful because it takes a while for them to stop producing milk. You can try these steps to ease the pain:

  • Apply a cold compress. Applying a cold, damp cloth reduces the pain. Surprisingly, chilled cabbage leaves work best for this situation too, as they take the shape of your breasts.
  • Empty some milk. Pump some milk out of your breasts and refrigerate the breast milk to bottle-feed your baby at a later time. This removes some of the pain. Be careful not to empty them, however, as your brain might think that it needs to produce more.
  • Leave your breasts alone. Be sure not to touch them too much. Massaging them sends a signal to your brain to produce more milk.

Be Patient During the Transition

Transitioning from breastfeeding to bottle feeding is not something that can be done overnight. It’s a slow process that involves a lot of patience for the mother. This is why transitioning your baby takes a lot of effort and time from all members of the family. But once your baby has successfully transitioned, it will all be worth it.

With consistency, encouragement, and support from your family, your baby will eventually adapt to their new feeding routine while continuing to grow healthy and strong.


Sources:

http://www.webmd.com/parenting/baby/features/weaningfrombreast

http://www.whattoexpect.com/firstyear/week47/weaning.aspx

http://www.babycenter.com/0_introducing-your-breastfed-baby-to-the-bottle-or-cup_473.bc

Fine Motor Skills Activities for Babies: 5 Fun Ways to Support Early Development

Once your baby discovers their hands, a world of wonder awaits them. Although learning to walk is a big milestone in your baby’s development, mastering their fine motor skills is no small achievement. According to Pediatric Occupational Therapist Dr. Rhoda Erhardt, it is through their hands that your baby demonstrates the link between thought and action. Developmental experts also say that manual dexterity is directly tied to cognitive development.

Babies don’t realize they can use their hands until they are about 2 months old. At around 2 to 4 months, they begin reaching for and swatting at objects as they learn how to control their movements. This is a great time to introduce simple activities that help strengthen your baby’s fine motor skills while making playtime more enjoyable.

Below are some activities that help develop your baby’s fine motor skills.

Fine Motor Skills Activities for Babies by Age

1. Hold It Tight (6 months and older)

Objective: This activity helps your baby learn how to develop grip.

Materials:

Any object or toy that fits comfortably in your baby’s hand, such as toy rattles or small stuffed toys. Choose soft toys or toys that won’t hurt your baby if they accidentally drop them.

How to do it:

  1. Pick one of your baby’s toys.
  2. Gently press the toy to your baby’s palm and help them close their fingers around the toy.
  3. Once your baby closes their hand around the toy, let go of it and see if they can hold onto the toy on their own.
  4. If your baby is unable to hold on and drop the toy, just pick it up and put it back in their hands for them to try again.
  5. Be sure to use a soothing voice and have a lot of patience when teaching your baby. Repeat all the steps until they learn to grip different toys.

2. Texture Box (9 months and older)

Objective: This fine motor skill activity introduces different textures and encourages your baby to explore with their hands.

Materials:

A box filled with objects of various textures, such as velvet and silk cloth swatches, smooth and rough fruits (such as apples and oranges), and other baby-safe household items.

How to do it:

  1. Set your baby on the floor.
  2. Show your baby how to pick up the different objects inside the box.
  3. Try to get your baby to pick them up one by one.

3. Transferring Toys (12 months and above)

Objective: This activity teaches your baby to grip onto an object and how to let go of it.

Materials:

  • Two Boxes
  • Soft toys of different shapes and sizes (stuffed toys, squeaky toys, plastic balls, etc.)

How to do it:

  1. This activity only works if your baby is able to sit up by themselves and crawl around.
  2. Place the boxes at least two feet apart and set your baby down between them.
  3. Fill one of the boxes with toys of different sizes.
  4. Teach your baby how to pick one toy up from that box and put it in the other box. Repeat the process until all the items have been transferred to the other box.
  5. Encourage your baby throughout the activity until they finish transferring the toys.

Remember to be patient and celebrate every successful transfer.

4. Play with Clay (18 months and older)

Objective: This activity develops your baby’s finger control, improves hand-eye coordination, and introduces them to colors and shapes.

Materials:

  • Modelling clay (different colors)

How to do it:

  1. Set your baby on the floor beside you.
  2. Take a handful of the modelling clay and mold it into any shape. Make sure to mold simple shapes that your baby can copy, such as triangles, squares, or circles.
  3. Encourage your baby to copy the shapes that you made using the same colors that you used to mold the shapes.

5. Cool Colors! (18 months and older)

Objective: This fine motor skill activity strengthens your child’s grip while improving hand-eye coordination and color recognition.

Materials:

  • Coloring books
  • Crayons (preferably non-toxic and larger in size for an easier grip)

How to do it:

  1. Set your baby on the floor with the coloring book propped open.
  2. Help them pick out a crayon and let them hold it.
  3. Slowly guide their hands in coloring the shapes and pictures in the book with the colors they like.
  4. Once they have a strong grip on the crayon, let go of their hands and let them finish coloring the pages by themselves.

Helping Your Baby Develop Fine Motor Skills Through Play

Developing fine motor skills doesn’t have to be complicated. Through simple, age-appropriate activities like these, your baby can strengthen their hand muscles, improve coordination, and build skills they’ll use throughout childhood.

Most importantly, remember that every child develops at their own pace. Enjoy these playful learning moments together and celebrate every milestone, no matter how small.

We hope this guide has answered your questions. If there’s anything else you’d like to know about our products or if you need assistance, feel free to contact our EQ support team.


Sources:

http://www.parents.com/baby/development/physical/encouraging-baby-motor-skill-development/

http://www.parents.com/baby/development/physical/fine-motor-milestones/

http://theimaginationtree.com/2014/03/fine-motor-skills-activities-babies.html

Baby’s First Solid Meal: Things to Keep in Mind

First smile, first step, and first solid food—these are just a few “firsts” that every parent looks forward to. Mothers often measure their baby’s growth by the milestones their little one has achieved.

Feeding your baby their first solid food can be a bit overwhelming, especially for first-time parents. There are a lot of things to consider: when to introduce solid food, what foods to offer, and how much your baby should eat. It is important to be mindful of these decisions because how you feed your baby now can help shape their eating habits in the future.

If you think it’s time to start feeding your little one solid food, consider the following.

Signs Your Baby Is Ready for Solid Food

According to experts, babies are ready for their first solid food by the time they are between the ages of four and six months of age. This is the time when they lose the natural reflex of pushing out any food placed into their mouths.

Try answering some of these questions about your baby:

  • Can they keep their head and neck up without your support when being spoon-fed?
  • Did their birth weight double since then?
  • Do they express interest in the food you are eating, or do they open their mouth when food comes their way?
  • When you try feeding your baby mashed potatoes or fruits like a banana or an apple, can they keep the food inside instead of dribbling it off their mouth?
  • Is the baby ready and willing to chew?
  • Do they grab food and put it in their mouth during mealtime?

If you answered yes to all of these questions, your baby may be ready to start eating solid food.

What Foods Can Babies Eat?

Many first-time parents worry about which foods are safe for their babies. A baby’s digestive system is still developing before 4 months of age, but different foods can be introduced as your baby grows.

Age

Recommended Foods 

4–6 months Single-grain cereals such as rice cereal or oatmeal
4–8 months Pureed vegetables, fruits, and meats
9–12 months Chopped, ground, or mashed foods such as finely chopped crackers, ground meat, fish, and chicken 

Foods to Avoid

On top of these allowable options, there are also certain types of food that babies are not yet allowed to eat. They are:

  • Nuts, Popcorn, Raisins, Dried Cranberries, and Peanut Butter – Given that babies are just starting to learn how to properly ingest and swallow food, these can be considered choking hazards.
  • Citrus – Some babies may be allergic to certain citrus fruits. It is better to consult with your doctor first to confirm and decrease the risk of an allergic reaction.
  • Honey – Honey can cause botulism, especially when introduced to the baby at an early age. Botulism is a serious paralytic illness that is triggered when the infant ingests infected food. If left untreated, botulism can cause paralysis of the respiratory muscles, trunk, arms, and legs.

Items That Make Feeding Easier

Now that your baby is ready to eat their first solid food, it would be nice to have certain items that can help make feeding them easier. Here are some baby-feeding tools you might want to purchase:

  • Use non-breakable plates and utensils to keep babies from harming themselves. Take note that at an early age, babies are pickier with the food that they want to eat and might have small tantrums during mealtimes. When your baby throws a tantrum during mealtime, having non-breakable utensils can help ensure that your baby does not harm themself.
  • Bibs for easier cleaning in case food falls out of your baby’s mouth.

Watch for Food Allergies

Although introducing a variety of foods is encouraged, some babies may be allergic to certain ingredients. Common food allergens include eggs, shellfish, peanuts, and cow’s milk, among others. Some doctors recommend delaying the introduction of certain allergenic foods until your baby is at least 6 months old, depending on their individual needs.

At the end of the day, the safest way to decide which solid foods to introduce is to consult your pediatrician.

Starting Your Baby’s Solid Food Journey

Introducing your baby to their first solid food can be both exciting and overwhelming. It is an important milestone, not only for parents but also for your baby’s growth and development. With patience, the right foods, and guidance from your pediatrician, you can help your little one develop healthy eating habits that may benefit them for years to come.

We hope you found this guide helpful. If you have any questions about our products or need additional assistance, our EQ support team is always ready to help.


Sources:

http://www.webmd.com/parenting/baby/babyfoodnutrition9/startingsolidfood

https://www.healthychildren.org/English/agesstages/baby/feedingnutrition

http://www.parents.com/baby/feeding/solidfoods/startingsolidsguide/

The Second Trimester of Pregnancy: Wows and Woes

Pregnancy is both a wonderful and trying time in a mother’s life. The joy of bringing a new member into the family is something that every couple looks forward to. Yet the first trimester is also marked by nervous waiting, endless morning sickness, and an emotional roller coaster ride for the mother. Thankfully, most things get better when the second trimester comes.

The second trimester, which happens from week 13 to week 27 of the pregnancy, is popularly known as the ‘honeymoon’ period. Unlike the rollercoaster that was the first trimester, this is the phase where morning sickness stops, emotions stabilize, and the mother’s sex drive returns. It’s also marked by several memorable ‘wows’ in every expectant mother’s life.

Second Trimester Wows: Milestones to Look Forward To

The second trimester brings many exciting milestones that make pregnancy even more memorable. Here are some of the “wows” you can look forward to during this stage.

Your Baby’s Gender May Be Revealed

The baby’s gender can now be identified. According to experts, the baby’s gender may be identified by your doctor during the second trimester. During a prenatal checkup, the doctor examines the baby through ultrasound, checks the baby’s health, and identifies the baby’s gender if the baby’s position allows it.

During your checkups, make sure to take your partner with you as this is the first time you can see your baby. This is one precious moment that you would not want him to miss.

Your Baby Bump Becomes More Noticeable

Take out your wallets, ladies, as it’s time to go shopping for maternity clothes! At this stage of pregnancy, your body starts showing visible changes such as:

  • Breast Enlargement – This is your body’s way of preparing you for breastfeeding. Make sure you are wearing a good support bra. There are instances when going up a bra size may be necessary.
  • Baby Bumps – By the second trimester, your baby bump is more visible as you gain weight over the next few weeks. In a healthy pregnancy, you usually gain around 25 to 35 pounds. Take note that at this stage of the pregnancy, most women need an extra 300 to 500 calories a day to keep the baby healthy.

You’ll Feel Your Baby Move for the First Time

One of the best moments of being a parent is feeling your baby move inside you for the first time.

Around the 18th week of pregnancy, your baby has developed fingers and is roughly the size of a chicken breast. By week 21, you may begin to feel gentle jabs and kicks as your baby adjusts their position inside the uterus. This is one moment that every mom, first-time or otherwise, always remembers as one of the happiest memories of pregnancy.

Unfortunately, pregnancy is not always so peachy. Here’s the other side of the coin.

What ‘Woes’ to Expect When You’re Expecting

As smooth as your pregnancy may be, there are a few notable ‘woes’ you may face as you move into the second trimester. Here are some of them:

Stretch Marks, Varicose Veins, and Lower Back Pain

As the baby inside you grows, your body has to stretch to accommodate your developing little one. Stretch marks start to appear across your belly and may leave itchy lines on your skin. Applying lotion may help relieve the itchiness. Varicose veins and lower back pain may also develop as your body adjusts to carrying additional weight.

Constipation and Heartburn

You may experience mild constipation and heartburn during the second trimester. Don’t worry—this is simply an effect of your body producing the hormone progesterone, which relaxes your digestive muscles and can contribute to acid reflux. Instead of eating large meals, try eating smaller, more frequent meals and increase your fiber intake to help reduce constipation.

Making the Most of Your Second Trimester

Unlike the roller coaster that was the first trimester, the second trimester may be the easiest period of pregnancy for many mothers. It is also the stage when you’ll notice some of the biggest physical changes as your baby continues to grow. Continue attending your prenatal checkups, eat a balanced diet, and take care of your body to support your baby’s healthy development.

By knowing what to expect when you’re expecting, you’re ensuring that you won’t just be a good mom, but the best one.

Want to learn more about what comes after the second trimester? Check out our guide to the third and final trimester of pregnancy to learn what to expect next. Also, if you have any questions about our products or need additional guidance, our EQ Support team is here to help.

Get your EQ Products from our Official Stores

Please transact only through the official EQ Diapers online stores and authorized channels. EQ Diapers and JS Unitrade Merchandise Inc. are not responsible for transactions made through unofficial sellers, fake accounts, or unauthorized online pages.

Follow EQ Diapers

For tips, updates and more!

Stay connected with EQ Diapers for expert tips,
exclusive promos, and everything you need for your little one. 💙